
Who says you need to go to a coffee shop to enjoy a good latte? You can make superb lattes at home—as long as you know how.
The coffee you choose to use is important in preparing a good latte.
You can choose to use any roasted coffee beans that you like regardless of whether you prepare your coffee with an espresso machine or any other alternative method.
Regarding the milk for your latte, I recommend whole (3.5% fat) milk for the creamiest result.
The whole process looks like this:
How to Make a Latte at Home – Step By Step
- Pull a Single or Double Espresso Shot
- Steam Your Milk to 113-122 Degrees Fahrenheit
- Homogenize Your Steamed Milk and Espresso
- Pour into a Ceramic Cup
- Enjoy!
If you’d like to drink a proper and delicious latte at home, but don’t know where to start or what you need, you’re in the right place.
It’s not complicated at all, you just have to follow my recipe on how to make a latte below with the right utensils. Do so and you’ll be sipping the best latte you’ve ever had before you know it.
Equipment You Need To Make A Homemade Latte
- Espresso plays an important role in making a latte because guess what? The latte is an espresso-based beverage. 😛 You’ll want to grind freshly roasted coffee beans to a fine size.
- An 8-oz. cup because you will make the latte based on a recipe that I’ve developed in the last 5 years of experience working as a barista. I’ve tried a lot of lattes recipes in various cup servings, from 8-12 oz. I chose this recipe which has 1.5 oz. of espresso and 6 oz. of milk served in an 8-oz. ceramic mug. For me, it’s the perfect one because the quantity of the espresso and the milk results in a very sweet, creamy, and balanced cup of coffee.
- Milk also plays an important role in the process because it gives sweetness and heavenly foam. But that is not all. We will talk more about milk a bit later.
- A pitcher for frothing the milk. (I prefer the Brewista Smart Pour Frothing Pitcher.)
- AND A LOT OF ENTHUSIASM 😎
Homemade Latte Recipe
Step 1: Make Espresso: Pull a Single or Double Espresso Shot
First of all, we need an 8-oz. cup and espresso; more precisely, 1.5 oz. of espresso for a double-shot latte and half that for a single-shot one.
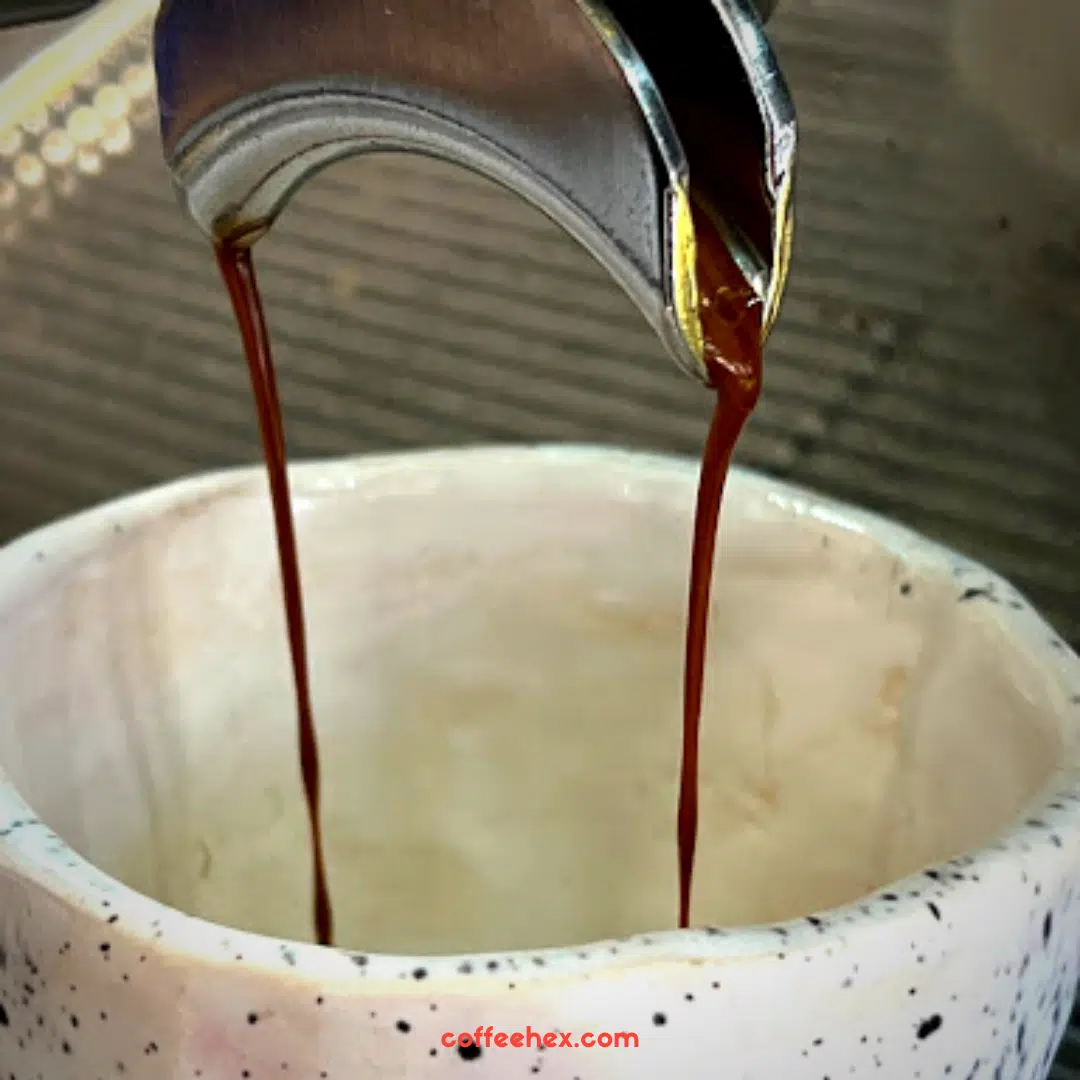
The difference between a single and double latte is the amount of espresso. Double lattes have two shots of espresso and are recommended for those who want to drink a beverage where they can also feel the coffee.
The single-shot latte is a lighter drink that’s best for those who don’t want to feel the caffeine effects or taste the espresso as much.
Step 2: Froth the Milk (Fat Content Makes a Difference)
As I mentioned above, when it comes to milk we need 3.5% milk (whole milk in the US). Milk fat gives the milk a sweeter taste and is so much easier to foam.
But you can also make a good latte with alternative milk like almond, cashew, or soy milk. Just remember that you need to add more air into the milk because the alternative milk doesn’t have animal fat, making it harder to froth.
Pro Tip: For a creamier latte texture using alternative milk, add more air and you will get the same result as with whole milk.
A word about steamed milk:
To make a latte, you will need to steam your milk. I am using an espresso machine here, which comes with an attached steam wand. But if you don’t have one, you’ll need a milk frother that also steams the milk, so you can make the right amount of milk foam with the right amount of bubbles (Learn more about steam vs. foam/froth here.)
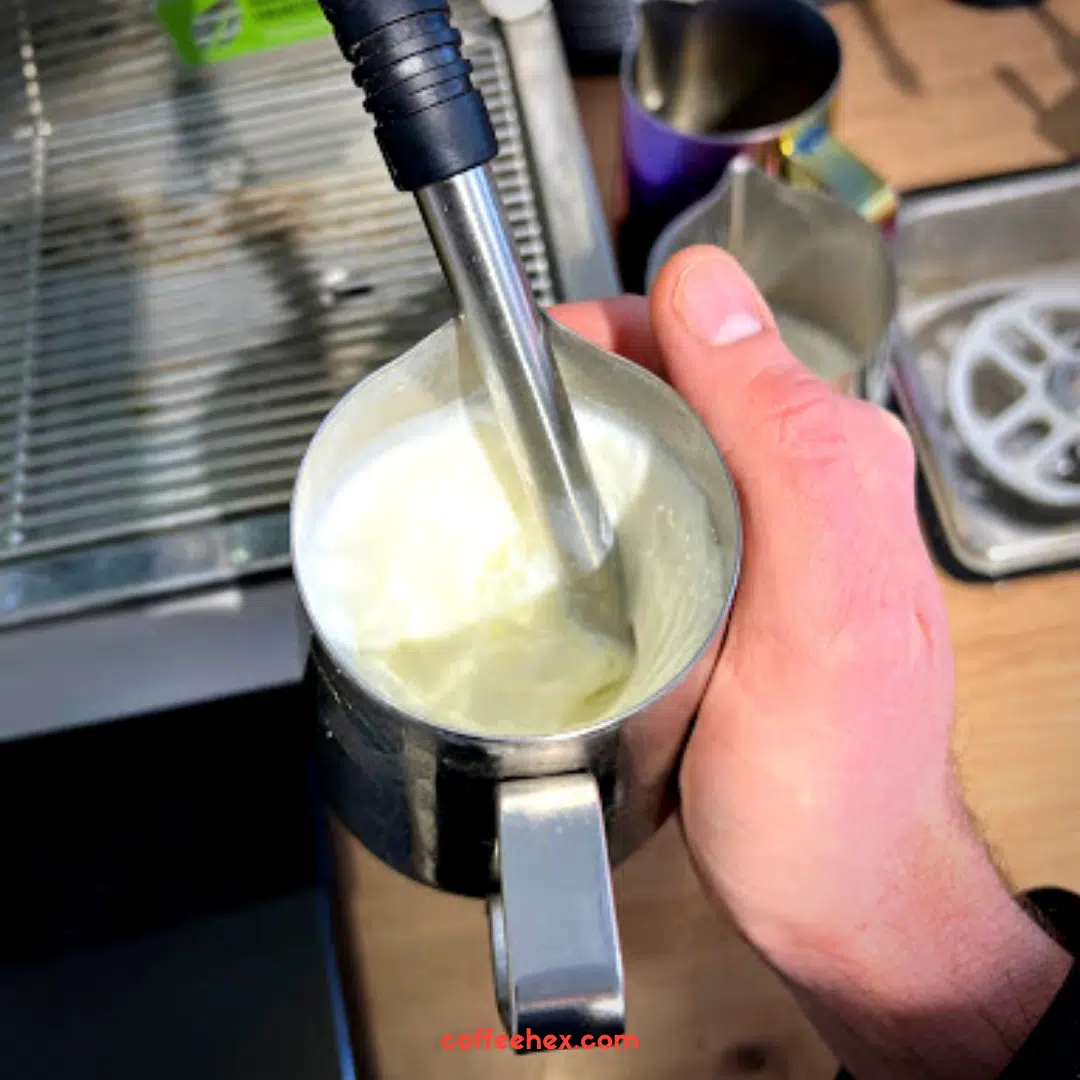
Step 3: Steam Your Milk at Home to 113-122 Degrees Fahrenheit
We need 6 oz. of whole milk steamed to about 113 degrees Fahrenheit. The temperature plays a very important role when it comes to taste. A temperature above 122 degrees Fahrenheit will decrease the sweetness of the milk. Much higher than that and you can start burning it.
The goal of every barista is to strike the right sweetness balance. So when we make lattes, we want to help ourselves to the milk’s sweetness and take full advantage of it.
The temperature of your milk enormously influences your latte’s overall taste. That’s why I suggest using a milk thermometer.
Froth Milk Correctly: Top Tips for Cafe Lattes

Step 4: Homogenize Your Steamed Milk and Espresso to Create Your Coffee Drink

Now that we have 1.5 oz. of espresso and the milk is ready, let’s start the final and also the most important part of this process:
The homogenization of milk with espresso.
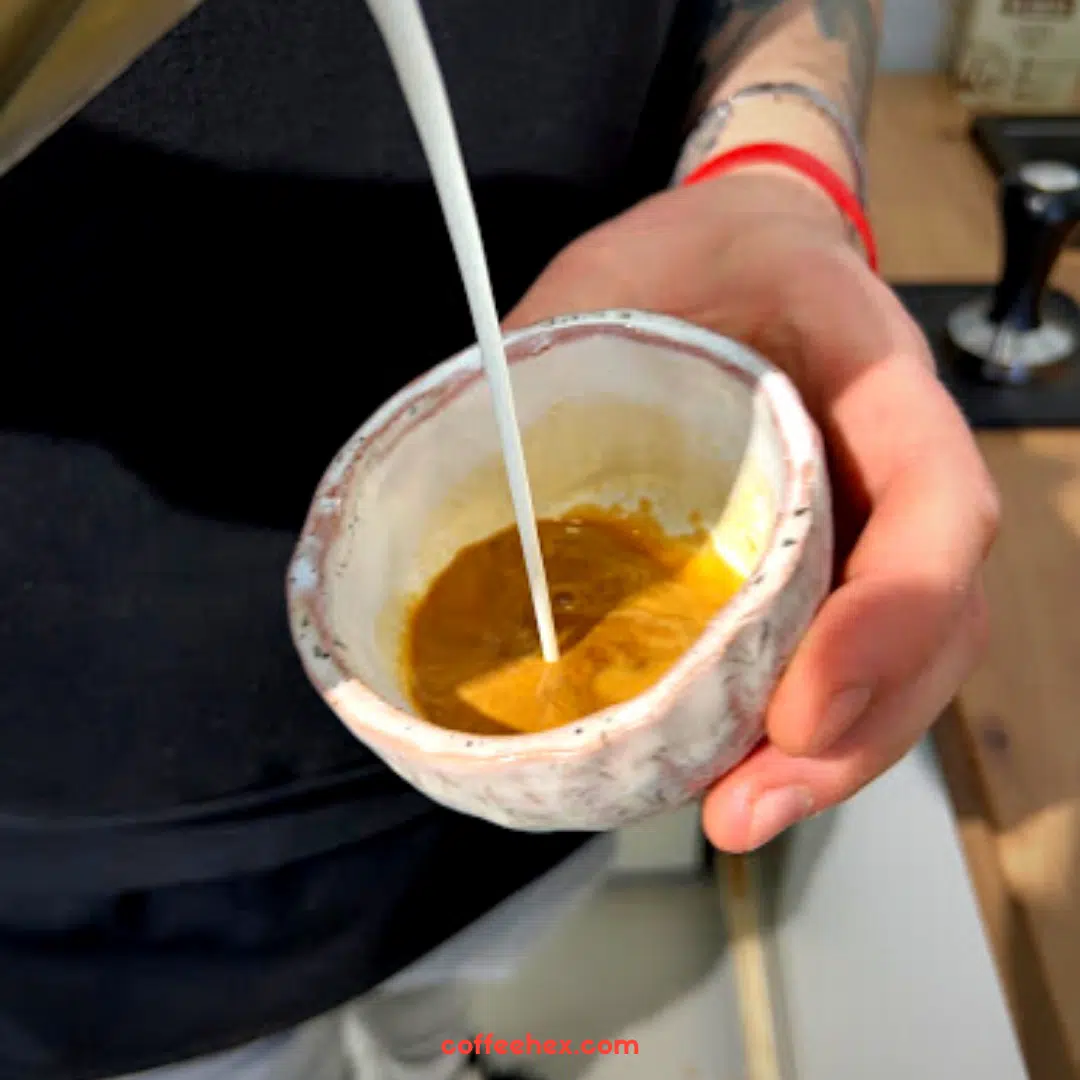
Oh, yes, it’s a whole thing. When you start this process, you need to pour 20% of the milk into the cup and start swirling. Stop turning the milk and swirl the cup 4-5 times to homogenize the milk with the espresso.
This step is very helpful because when homogenization happens you will get a sweet and balanced cup of coffee.
Step 5: Top Your Drink Off With Latte Art and Enjoy Its Creamy Latte Flavor!
After this step, just finish pouring the milk into the cup in circles so it layers with the espresso nicely. If you’re keen, you can experiment with pouring an artful design with the milk foam that’ll come out after your steamed milk. Voila, your homemade latte is ready.

What if You Don’t Have an Espresso Machine?
There are ways to make espresso at home without an espresso machine. While having an actual espresso machine is ideal for making authentic espresso, there are several methods you can use to make a similar concentrated coffee at home. Here are a few popular alternatives to make your espresso at home without a machine:
1. AeroPress
The AeroPress is a versatile coffee brewing tool that’s relatively affordable and easy to use. Here’s a basic way to mimic espresso using an AeroPress:
- Grind your coffee beans to a fine consistency, similar to table salt.
- Assemble the AeroPress with a filter and place it over your cup.
- Add coffee: Use about 14 to 18 grams of coffee.
- Add hot water (around 200°F or 93°C): Fill to the number “2” marker.
- Stir vigorously for about 30 seconds.
- Press: Slowly press the plunger down, applying steady pressure. This should take about 20-30 seconds.
BTW: I wrote a full guide on how to make AeroPress coffee if you’re interested.
2. Moka Pot (Stovetop Espresso Maker)
The Moka pot, also known as a stovetop espresso maker, can create espresso or strongly brewed coffee:
- Grind your coffee beans to a fine consistency, a bit finer than for drip coffee but not as fine as for true espresso.
- Fill the bottom chamber of the Moka pot with water up to the safety valve.
- Add coffee: Place the coffee grounds in the filter basket, leveling them off without pressing them down.
- Assemble the pot: Screw the top and bottom parts together tightly.
- Heat: Place the Moka pot on the stove over medium heat. Brew until you hear a hissing sound, which means the water reservoir is empty and the coffee is done.
3. French Press
While the French Press won’t give you straight up espresso, you can use a French Press to make a strong coffee concentrate that can be used similarly:
- Grind your coffee beans to a medium consistency, similar to coarse sea salt.
- Add coffee: Use about 18 to 20 grams of coffee per 100 ml of water for a stronger brew.
- Add hot water (around 200°F or 93°C): Pour into the French Press.
- Stir the coffee grounds into the water, ensuring they are fully saturated.
- Steep: Let it steep for about 4 minutes.
- Press: Press down the plunger slowly and steadily.
After you’re done creating your super concentrated coffee with one of the methods above, set it aside and continue with step 2 above. You’ll pour the espresso into the milk, so try not to let it sit for more than a few minutes before making your latte.
How to Make Milk Foam at Home Without a Machine
So you can see I am using the frother on my espresso machine. If you’re making your latte with an espresso machine too, this makes it easy. But if you don’t have an espresso machine to make your frothy milk, there are a couple of alternatives you can try.
1. Using a French Press
Materials:
– French press
– Milk (whole milk or other alternatives)
Instructions:
- Warm the milk in a saucepan or microwave until it’s hot but not boiling.
- Pour the hot milk into the French press, filling it no more than halfway.
- Place the lid on the French press and move the plunger up and down vigorously for about 30 seconds. The milk will foam up.
- Continue with my directions above.
2. Using a Jar
Materials:
– Jar with a tight lid
– Microwave
Instructions:
- Pour the desired amount of milk into the jar, filling it no more than halfway.
- Screw the lid on tightly.
- Shake the jar vigorously for about 30-60 seconds. The milk should froth up and nearly double in volume.
- Remove the lid and microwave the jar (without the lid) for about 30 seconds. This will stabilize the foam.
- Continue with my directions above.
3. Using a Hand Whisk
Materials:
– Hand whisk
– Small saucepan or microwave
Instructions:
- Warm the milk in a saucepan or microwave until it’s hot but not boiling.
- Pour the hot milk into a bowl or keep it in the saucepan.
- Use the hand whisk to vigorously whisk the milk until it becomes frothy. This may take a few minutes.
- Continue with my directions above.
4. Using an Immersion Blender
Materials:
– Immersion blender
– Tall container or pitcher
Instructions:
- Warm the milk in a saucepan or microwave until it’s hot but not boiling.
- Pour the hot milk into a tall container or pitcher.
- Use the immersion blender to blend the milk until it becomes foamy. This should take about 20-30 seconds.
- Continue with my directions above.
5. Using an Electric Beater
Materials:
– Electric beater
– Tall container or bowl
Instructions:
- Warm the milk in a saucepan or microwave until it’s hot but not boiling.
- Pour the hot milk into a tall container or bowl.
- Use the electric beater to whip the milk until it becomes frothy. This should take about a minute.
- Continue with my directions above.
8 Tips on Foaming Plant Milks at Home
If you want to make the perfect latte at home without full-fat dairy milk, like whole (which is the preferred milk to use for baristas like myself because it’s so much easier to work with), here are a few tips.
- Barista Blends: Opt for barista-specific versions of plant milks whenever possible. These are formulated to foam better and have a creamier texture. Popular options include oat, almond, soy, and coconut barista blends.
- Shake Well: Always shake your plant milk carton or bottle before use to ensure even distribution of all ingredients.
- Temperature: Heat your plant milk to around 150°F (65°C). Higher temperatures can cause the milk to burn and separate.
- Angle and Depth: When using a steam wand, start with the tip just below the surface of the milk to introduce air, creating foam. Once you have enough foam, submerge the tip deeper to heat the milk evenly.
- Swirl and Tap: After frothing, swirl the milk jug and tap it on the counter to break any large bubbles and achieve a smooth, velvety texture.
- Trial and Error: Different brands and types of plant milk froth differently. Experiment with various options to find the one that works best for you.
- Use Fresh Milk: Fresher milk tends to froth better. Avoid using older milk, as its frothing capability diminishes over time.
- Additives: Some people add a drop of oil (like coconut oil) or a pinch of sugar to help certain plant milks foam better, though this might alter the taste slightly.
Specific Plant Milks
Oat Milk:
– Consistency: Look for oat milk that has added oils or stabilizers.
– Technique: Oat milk froths well and holds its foam with the right technique and temperature.
Almond Milk:
– Consistency: Almond milk can be more challenging to froth, so a barista blend is recommended.
– Technique: Use a combination of introducing air at first and then heating as described.
Soy Milk:
– Consistency: Soy milk generally has a thicker consistency compared to some other plant milks, making it a good option for frothing. It often has a higher protein content, which helps create a stable foam.
– Technique: When frothing soy milk, start by introducing air to it for just a few seconds until it reaches a temperature around 100°F (37°C). Then fully submerge the steam wand to heat the milk to 150°F (65°C). Avoid overheating, as soy milk can curdle at high temperatures.
Final Thoughts on How to Make a Latte Drink at Home
Making a latte at home is not as complicated as it may seem. With the right equipment and ingredients, anyone can enjoy this delicious, creamy, and sweet coffee drink from the comfort of their own kitchen.
Espresso plays a crucial role in making a latte, and using the right amount of milk, with the right fat content, and steaming it to the right temperature is essential.
Remember to homogenize the milk with the espresso, and pour it in circular motions to ensure a consistent taste throughout.
With some enthusiasm and practice, you can enjoy a barista-quality latte to rival your favorite coffee shop, any time you like.
So did you make this latte recipe? Give me your feedback and let me know in the comments!
How to Make a Latte FAQs
What ingredients do I need to make a latte at home?
To make a latte at home, you’ll need 2 shots of espresso, milk (any kind, but you can try coconut milk for a twist), and your favorite sweeteners or flavorings like vanilla syrup. Optionally, you can also use a handheld milk frother to froth milk for a latte.
How do I make the espresso for my homemade latte?
To make the espresso, you can use an espresso machine if you have one. If not, a stovetop espresso maker or even a strong brewed coffee can work in a pinch. Aim for 2 shots of espresso for a standard 12 ounce latte.
What’s the best way to froth milk for a latte?
Frothing milk is really easy to make at home using a handheld milk frother. Simply warm the milk (but don’t boil it), then use the frother to create a nice foam. If you don’t have a frother, you can also shake the milk in a jar or whisk it by hand.
Can I make an iced latte at home?
Absolutely! To make an iced latte at home, combine your 2 shots of espresso with cold milk and pour over ice. You can also learn how to make an iced vanilla latte by adding vanilla syrup to the mix. See my full tutorial on how to make an iced latte here.
How does a latte differ from a cappuccino?
A latte contains 2 shots of espresso, a lot of steamed milk, and a small layer of foam on top. A cappuccino, on the other hand, has equal parts of espresso, steamed milk, and foam, making it a bit stronger in coffee flavor compared to a latte.
Can I add flavors to my homemade latte?
Yes, you can add various flavors to your homemade latte to jazz it up! Popular choices include vanilla syrup for a vanilla latte, pumpkin spice for a pumpkin spice latte, or even chocolate syrup for a mocha twist.
What’s the best milk to use for a latte?
The best milk for a latte depends on your preference. Regular dairy milk froths up well, but if you’re dairy-free, you can use coconut milk or almond milk. Each type of milk will give your latte a slightly different texture and flavor.
How do I make a homemade iced vanilla latte?
To make a homemade iced vanilla latte, start by making 2 shots of espresso. Let it cool slightly, then mix it with cold milk and add a splash of vanilla syrup. Pour the mixture over a glass filled with ice. Enjoy your iced vanilla latte!
Is it easy to make a latte at home?
Yes, it’s really easy to make a latte at home! With just some basic ingredients and tools like an espresso machine or handheld milk frother, you can enjoy a delicious latte anytime you want. It’s also a fun way to customize your drink to your taste.
What’s the secret to a good iced latte?
The secret to a good iced latte is balancing strong espresso with the right amount of cold milk and ice. Make sure your espresso is cool before mixing to avoid melting the ice too quickly. You can also experiment with different flavors like vanilla or caramel to find your perfect iced latte.